
How to Propagate Cuttings Step-by-Step
There are many ways to propagate Monstera Albo cuttings — perlite, moss, straight water, semi-hydro, and everything in between. People have success with all of them. We're not here to say there's only one way.
What we can say is that this is the approach we use, the approach we recommend to our customers, and the one we've found to be the most consistent across a huge number of cuttings. If you've lost plants to rot, waited months for weak roots that never really took off, or just want a clear process to follow — this guide is for you.
Step 1: Get Your Materials Right
Most propagation failures come down to setup. With this method, your tools matter just as much as your technique. Get this wrong and it doesn't matter how perfect your cutting is.
- A healthy Monstera Albo cutting with at least one node
- Sterile glass jar or clear vessel
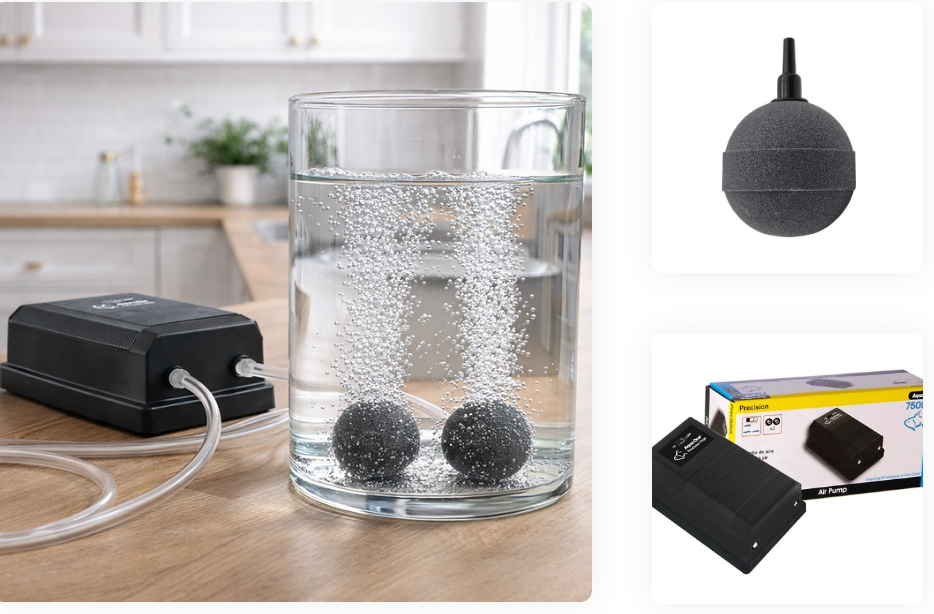
- Air pump, airline tubing and oxygen stone — strongly recommended
- Hydrogen peroxide 3% (pharmacy grade)
- Sharp knife, surgical blade or clean scissors
- Rubbing alcohol and a clean cloth
- Bamboo sticks and cable ties to stabilise your cutting
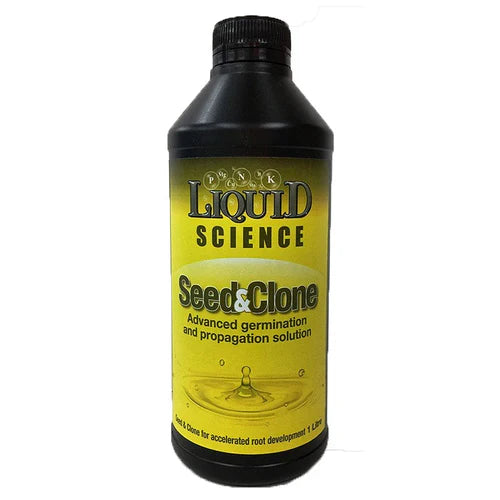
- Seed & Clone Starter Solution (for the water)
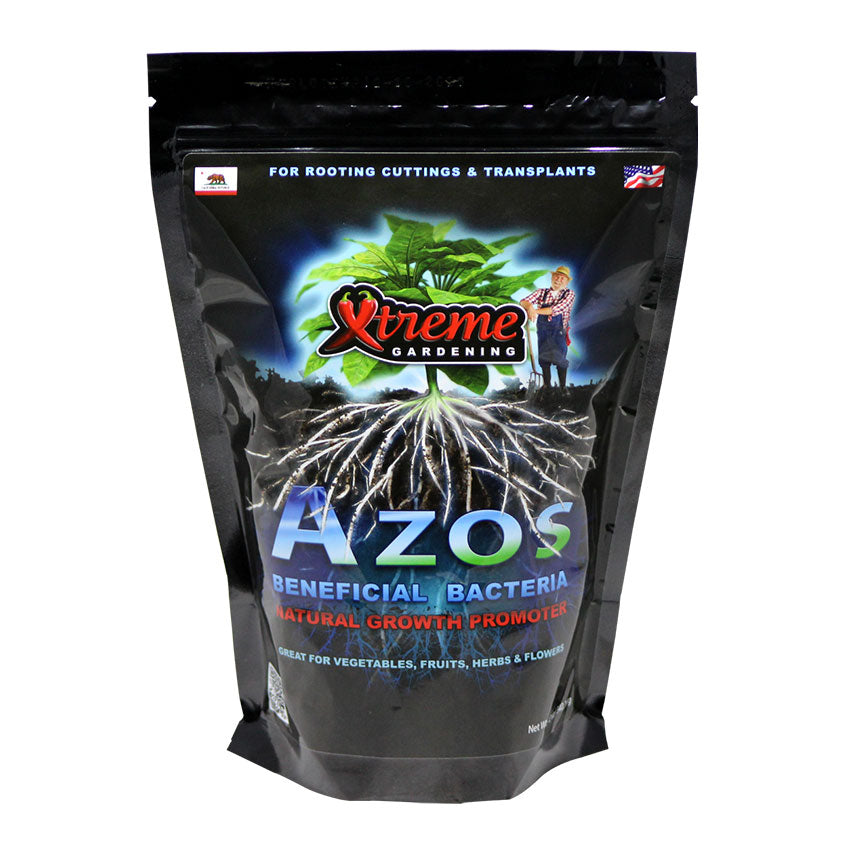
- Azos Nitrogen Fixing Bacteria — transplant stage only (more on this below)
💡 Pro tip: Sterility is king. Wipe your blade with rubbing alcohol before every single cut. One dirty slice can cost you the cutting — and at Albo prices, that's not a mistake you want to make twice.
Step 2: Set Up Your Propagation Station
Position the Cutting Correctly
Fill your sterilised jar with clean water. Submerge the aerial root but keep the stem above the waterline — this is where most people go wrong and where rot begins. Use bamboo sticks and ties to hold the cutting at the right height. It needs to be stable, not floating around.
Oxygen Is Everything
Connect your pump, drop the oxygen stone in and let it run. Constant bubbles mean constant oxygenation. Roots thrive in it. Bad bacteria suffocate in it. This single step separates this approach from every "stick it in a jar" method you've seen online. If you're running multiple cuttings — and once you see the results you will be — grab the double kit so both stations run simultaneously.
Add Hydrogen Peroxide + Seed & Clone
Add 3ml of 3% hydrogen peroxide per litre of water. This keeps pathogens down and your roots clean and white. Redose every 3 days — don't skip it. Then add your Seed & Clone Starter Solution as directed — it gives the developing roots everything they need to push hard and fast from day one.
Step 3: Transplant — This Is Where Azos Comes In
Once your roots are a few inches long, you're ready to move. Don't rush this — weak roots going into soil is another common failure point. Wait until you see strong, healthy growth before pulling the trigger.
Now is when Azos earns its place. Coat the roots generously with Azos beneficial bacteria immediately before putting them in the pot. Azos accelerates the transition into soil, significantly reduces transplant shock and gets the root system expanding fast. Because it's a living bacteria, you're applying it here — away from the peroxide — where it can actually survive and do its job.
Move into a 70/30 coco-perlite mix and place in bright indirect light. Direct sun will scorch an Albo faster than you think. The variegation that makes them beautiful also makes them more sensitive than a standard green Monstera. Treat them accordingly.
Step 4: Long-Term Care — The Part Most People Ignore
Your cutting is alive. Now keep it that way. Get the cadence right — moisture, nutrients, airflow, temperature — and your Albo will reward you with rapid, stable growth. Get it wrong and you'll watch it slowly yellow and decline wondering what happened.
Propagation isn't just about getting roots. It's about building a plant that actually thrives long term. That means feeding it correctly from day one, not guessing your way through it.
What You Need
Quick FAQ
Why not add Azos to the propagation water?
Because hydrogen peroxide kills it. Azos is a living beneficial bacteria — it can't survive in peroxide-dosed water. This method uses peroxide throughout the water phase to prevent rot and keep roots clean. Azos gets introduced at transplant, applied directly to the roots, where it can actually do its job without being destroyed.
How do I know when roots are ready for transplant?
Wait until you have strong, healthy roots a few inches long — not just hair-fine stubs. Rushing this is one of the most common failure points. Weak roots hitting soil too early usually means a slow, struggling plant. Give it time and transplant with confidence rather than crossing your fingers.
Why does this method use an air pump?
Oxygenated water is the single biggest difference between this and a basic water propagation. Roots thrive in oxygen-rich water. Bad bacteria that cause rot suffocate in it. Still, stagnant water is where cuttings go to die — and at Albo prices, that's not a risk worth taking. The pump runs 24/7.
Why keep the stem above the waterline?
The aerial root goes in the water — the stem does not. Submerging the stem is one of the most common causes of rot. Use bamboo sticks and cable ties to hold your cutting at the correct height from day one. A stable cutting is a cutting that roots.